Bonsai 101

Although the art of bonsai is often linked to thoughts of Japan, but this practice is actually much older (around 2,000 years) and has deep roots into Chinese history and culture, except here it was known as "penjing".
Both the terms bonsai and penjing roughly translate to a pot that holds a plant or scenery.
The art of penjing was later adopted by the Japanese around 700 years ago, where it began to be refined and influence Zen Buddhism.

Contrary to popular belief, plants used for bonsai are not a specific type of tree designed to be smaller, any tree/shrub etc can be used in this art form, it is the actions and processes we undertake that ultimately produces/forces the plant to become a bonsai.
Below is one way of creating your bonsai.

A bonsai is a plant, generally speaking, that has been grown in a shallow pot or container, this has restricted it's root growth and food storage capabilities which forces them to 'stunt' and usually keeps under 1 meter tall.
There are roughly ten different size classifications that a bonsai may fall into.
. Keshitsubo - 1-3" (3-8cm)
. Shito - 2-4" (5-10cm)
. Mame - 2-6" (5-15cm)
. Shohin - 5-8" (13-20cm)
. Komono - 6-10" (15-25cm)
. Katade-mochi - 10-18" (25-46cm)
. Chumono/ Chiu - 16-36"
. Omono/ Dai - 30-48" (76-122cm)
. Hachi-uye - 40-60" (102-152cm)
. Imperial - 60-80" - (152-203cm)


Some plants do better than others, these include:
. Cedar
. Cypress
. Pine
. Maple
. Ficus
. Azalea
. Cherry
But others such as wisteria, oak, birch, cotoneaster and jacaranda are also commonly used.


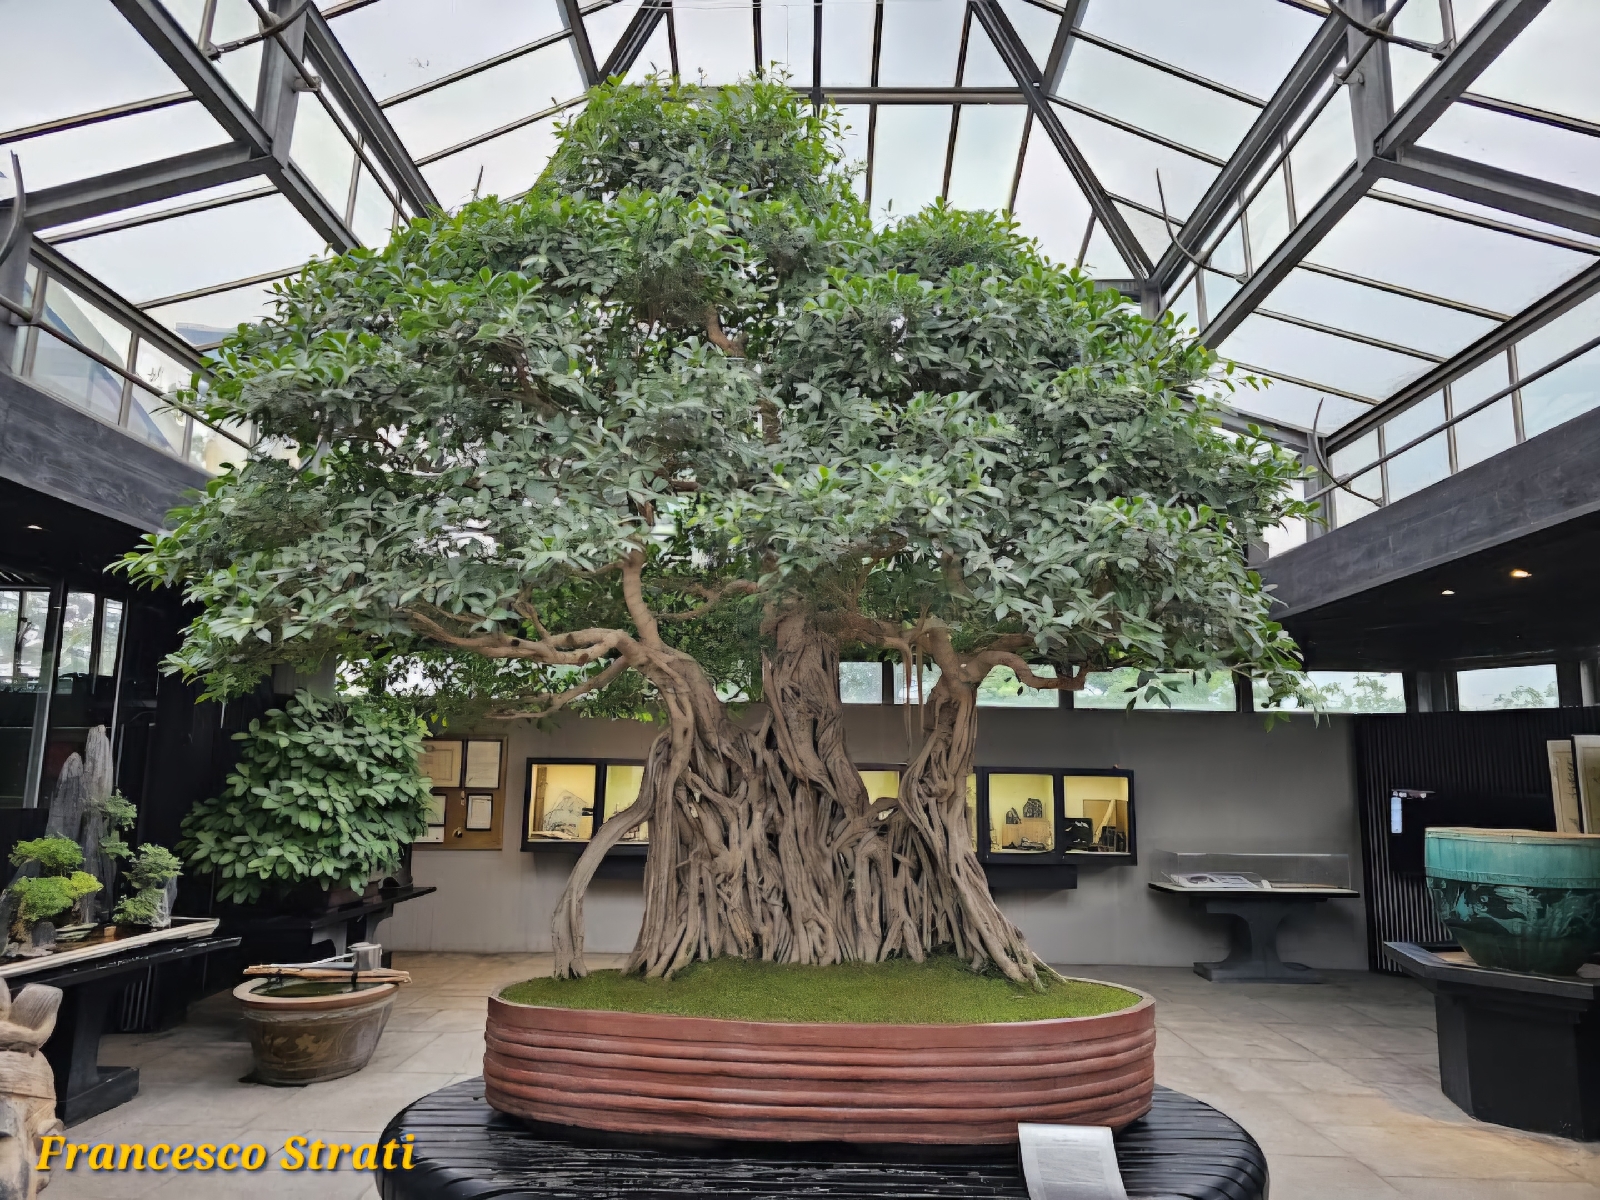
Did you know this bonsai (image below) is thought to be the oldest recorded, it is a Ficus retusa linn, and is thought to be over 1,000 years old and now around ten foot tall! It is housed in the Crespi Bonsai Museum of Italy, along with many many stunning specimens.
So how do we make our own little bonsai you may ask?
It is a little bit of a process and takes time and patience, it is a hobby and tree for a lifetime.
When picking your plant, think carefully about where you want to keep it and it's requirements, things such as:
. How much light does it prefer?
. Temperature - e.g. tropical plants will
need more heat and humidity
. Watering
If you are wanting to keep your bonsai indoors or under shade the majority of the time you may want more of a shade dwelling tree, such as an indoor Ficus or umbrella tree. Things like oaks, cypress etc will be more suited to a sunnier spot on the patio where the get at least several hours of direct light followed by indirect light each day.
What we need:
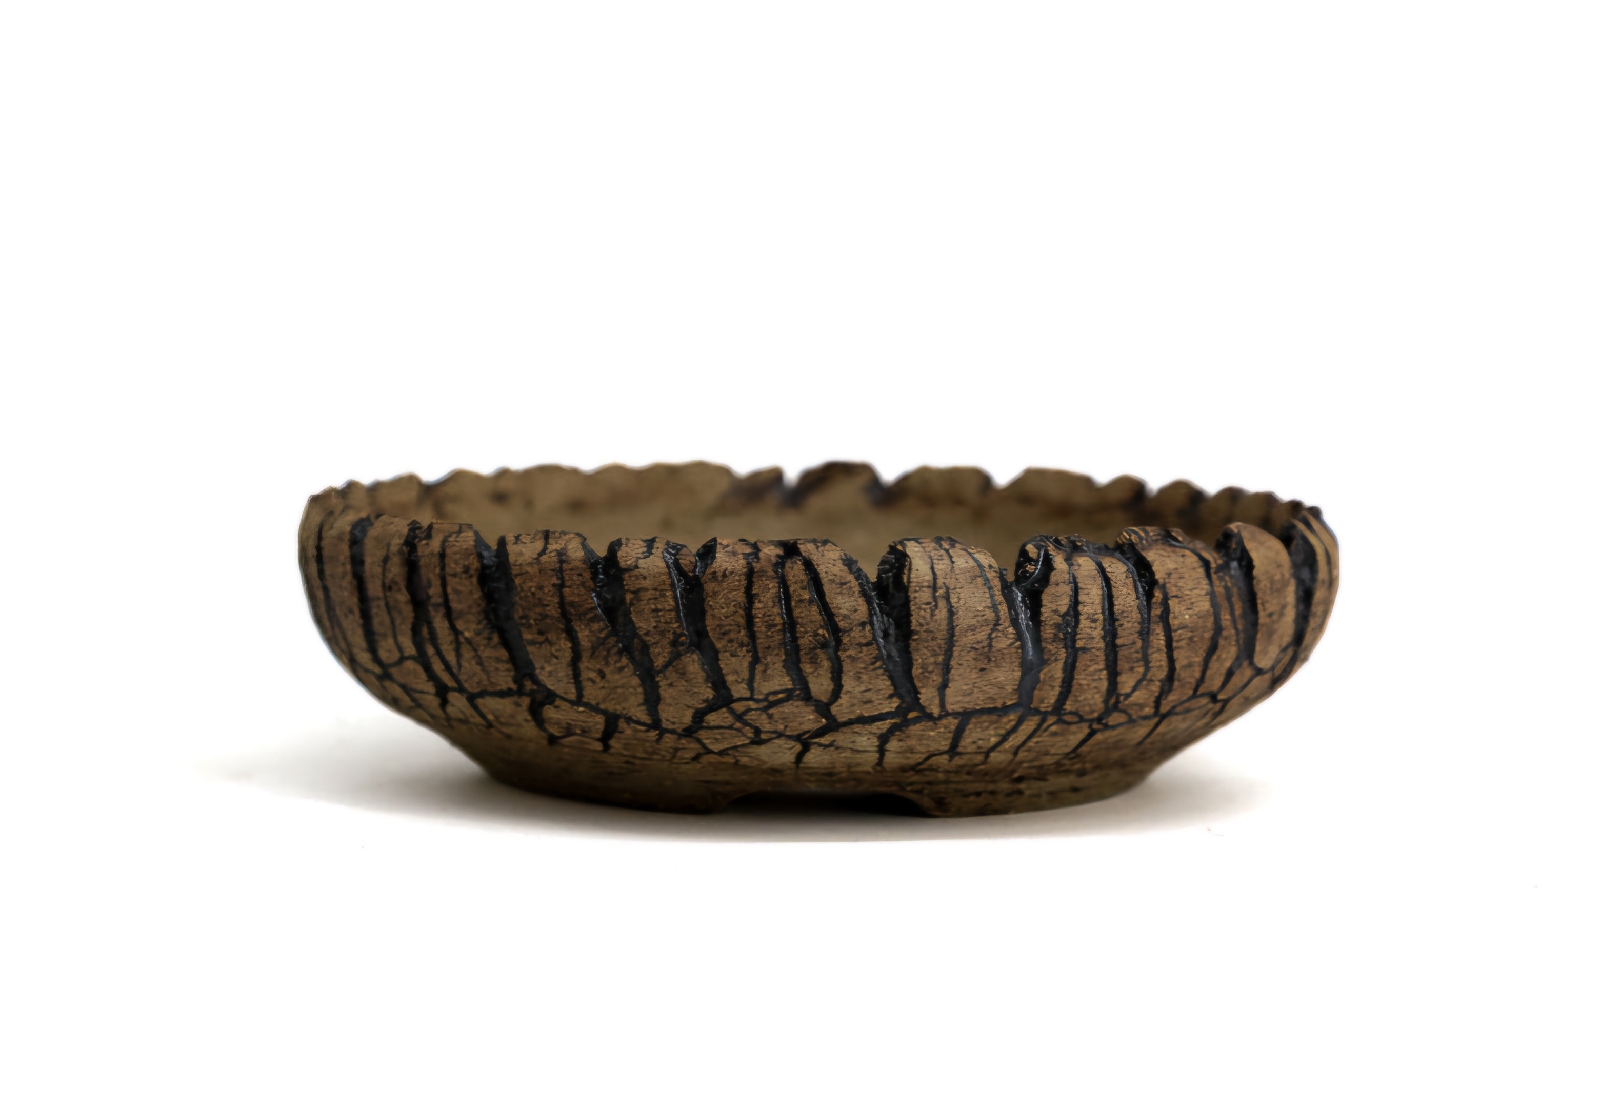
. Shallow pot
. Selected tree
. Bonsai potting mix
. 3cm x 3cm piece of mesh (check against
. Watering
If you are wanting to keep your bonsai indoors or under shade the majority of the time you may want more of a shade dwelling tree, such as an indoor Ficus or umbrella tree. Things like oaks, cypress etc will be more suited to a sunnier spot on the patio where the get at least several hours of direct light followed by indirect light each day.
What we need:
. Shallow pot
. Selected tree
. Bonsai potting mix
. 3cm x 3cm piece of mesh (check against
your pots drainage hole size)
. Small pebbles/ gravel - drainage
. Decorations/ gravel - surface (optional)
. Small piece of wire (optional)
. Chopstick or something similar in size
. Clean, sharp scissors or snips
. Seasol or similar
Now we have everything we can begin.
1. Give your pot a quick rinse out, just making sure there's nothing undesirable in/ on it.
2. Take your 3cm square piece of mesh and place it over the drainage hole, this will stop your gravel and potting mix escaping.


3. Add your fine drainage gravel, just a light scattering over the very bottom, it doesn't need to be deep.

4. Gently remove your plant from its pot, and, using your chopstick gently remove at least half of the existing potting mix from around the root ball, be careful not to damage the roots. If necessary you can trim some of the more straggly roots, at this stage do not trim too many, you will trim them eat time you repot.
Note: Plants like pine and cypress need at least half of their root ball undisturbed.

5. Now your plant is prepared, place it in the pot, and add your bonsai potting mix.
Here you may wish to use your piece of wire to anchor your plant in place but it is not crucial.
Using your chopstick again, gently poke the potting mix down between the roots, this may take some time.
Here you may wish to use your piece of wire to anchor your plant in place but it is not crucial.
Using your chopstick again, gently poke the potting mix down between the roots, this may take some time.
6. Carefully water in your tree with your seasol solution (follow instructions), you may wish to use the back of a spoon or something similar to break the force of the water. Seeing water coming out of the bottom is normal.
7. If you like, now is the time to add any gravel to pretty up the top and decorations if you wish.

In a few weeks your little bonsai should have settled in, and if it's putting on new growth you may wish to trim it up a little bit or add wire to start bending it gently into shape.. Go for it! Be gentle and careful not to trim off to much as your tree is still establishing itself. Be sure to check frequently whether your plant needs water, to do this, simply pop your finger in the soil to about the first knuckle, if it's dry, give it a gentle water, if still feeling damp, check again tomorrow. Due to it's shallow pot and lots of roots, chances are it will need watering daily, especially if outside.
In a few weeks your little bonsai should have settled in, and if it's putting on new growth you may wish to trim it up a little bit or add wire to start bending it gently into shape.. Go for it! Be gentle and careful not to trim off to much as your tree is still establishing itself. Be sure to check frequently whether your plant needs water, to do this, simply pop your finger in the soil to about the first knuckle, if it's dry, give it a gentle water, if still feeling damp, check again tomorrow. Due to it's shallow pot and lots of roots, chances are it will need watering daily, especially if outside.
Note: During it's growth periods and when newly planted, seasol will be highly beneficial in reducing stress, be sure to provide this every two weeks.
At the end of winter, a good quality, slow release bonsai fertiliser is recommended, followed by, in early spring a liquid fertiliser to give it a good boost for its main growth period.
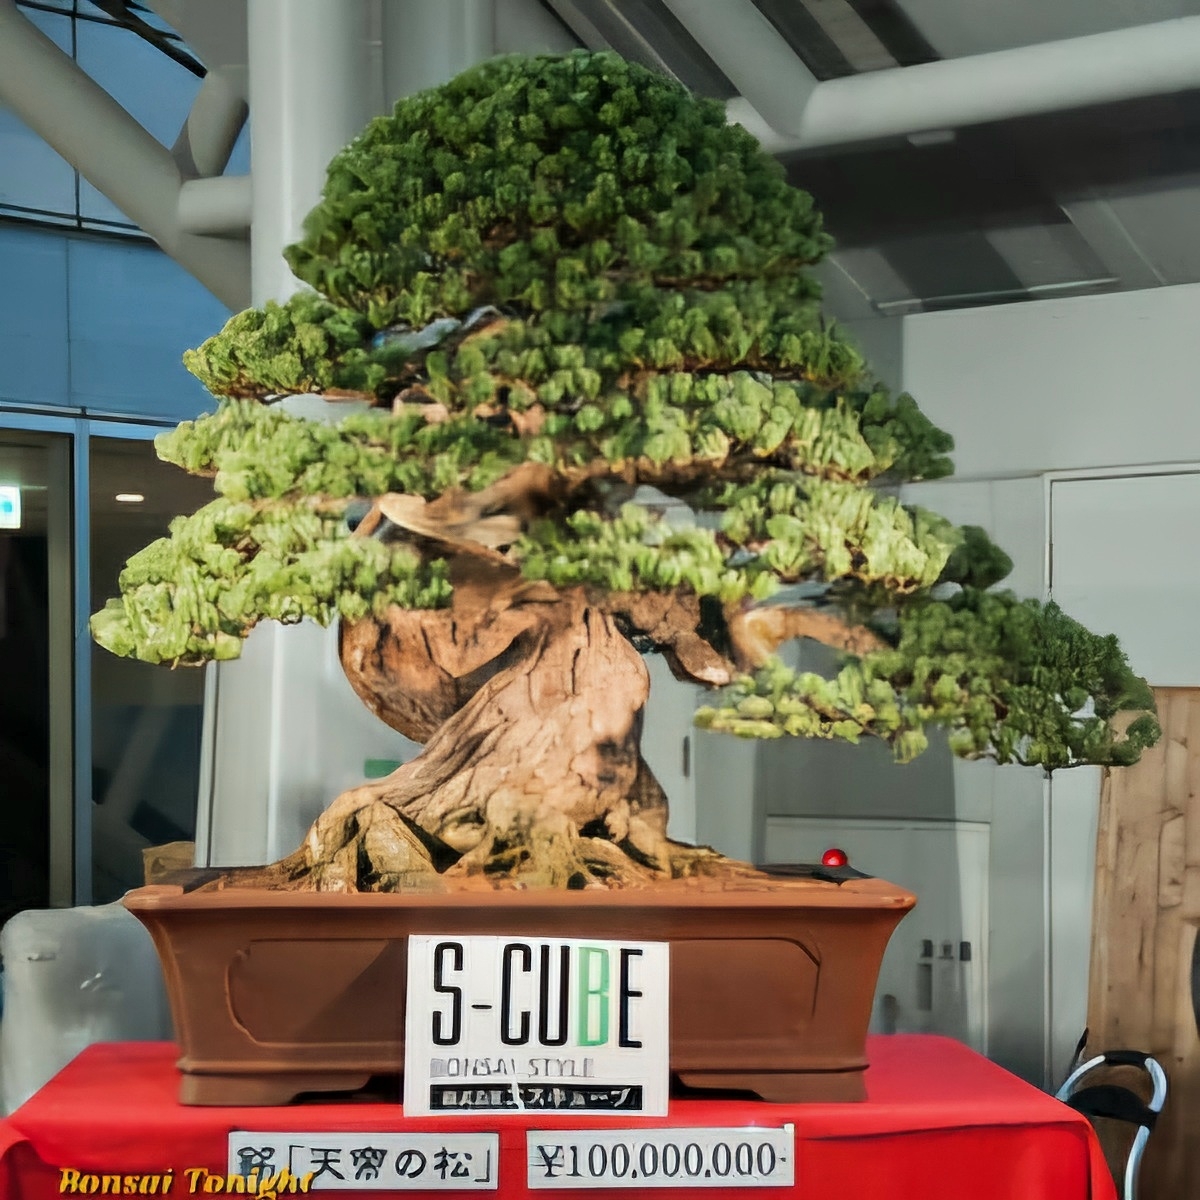
Did you know, this 800 year old pine is one of the most expensive bonsais ever sold, selling for a whopping $1.3 million dollars!
Your bonsai will not live it's whole life in their first pot, as they grow they will need to be upgraded otherwise they can become pot bound. Also as times goes by the potting mix will degrade and need to be replaced. On average you'll likely have to repot every two to five years, depending on the growth rate of your tree.
When it comes time to repot your beautiful bonsai, the process is extremely similar to how we started:
. Remove from pot (you may have to cut
your anchor wire)
. Remove potting mix
. Re-mesh and re-anchor
. Trim roots
. Add new potting mix, poking into roots
. Water in well with seasol
Ta-daaaaaa! Done! You've just re-potted your bonsai.
So head over to Bunnings, grab a starter kit, or head to your local gardem centre grab a pre-started bonsai, or a sapling ro start your own!

Comments
Post a Comment